How to Draw a Tiger
from wikiHow - The How to Manual That You Can EditWhat's a big cat with stripes that doesn't meow? It's certainly not Garfield! Here's a quick tutorial on how to draw a tiger!

Steps
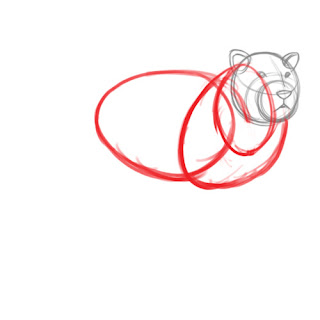
- Draw a few basic shapes to start. Sketch the head using a large circle and within that draw another to serve as the snout. Add circular facial guidelines to help you with features in subsequent steps.

- Draw two round-cornered triangles for the ears and another smaller set of triangles inside that. Draw a diamond shape for the nose and an inverted "Y" shape for the mouth. Add in two small circles for the eyes.

- Draw three ovals as guides for the body. Draw a small one for the neck and two large ones for the body.
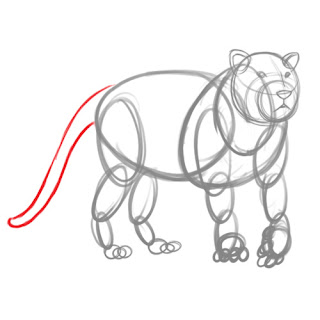
- Add in three large ovals for each leg. Put a small circle for each foot, with small ovals for the paws.

- Add in two lines for the tail. They should be thicker at the base, tapering off to a slightly rounded end.
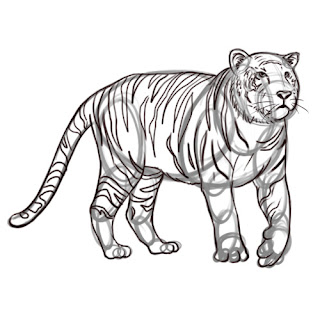
- Sketch in the details. Add fur, whiskers, and claws. Don't forget the tiger's trademark stripes!
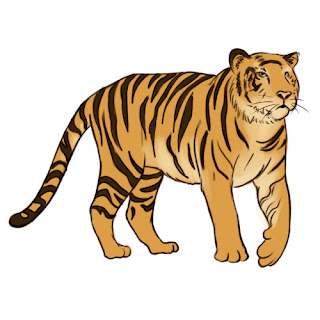
- Outline the image and color it in! Make sure all excess guidelines are erased, and use mostly orange/brown with darker stripes for the body.


Tips
- Draw lightly in pencil so that you can easily rub out mistakes.
- If you want to use markers/watercolors to color your drawing, use paper that is relatively thick and line over your pencil more darkly before doing so.
Related wikiHows
- How to Draw a Baby Tiger
- How to Draw a Cartoon Lion
- How to Draw a Lion
- How to Draw a Realistic Cat's Face
- How to Draw a Cheetah